CILLITEC UAV-DRONE

CILLITEC UAV-DRONE

mercoledì 30 aprile 2014

FireFLY6 Demonstrates Half Hour Flight Time


FireFLY6 Demonstrates Half Hour Flight Time


Read the whole story here.

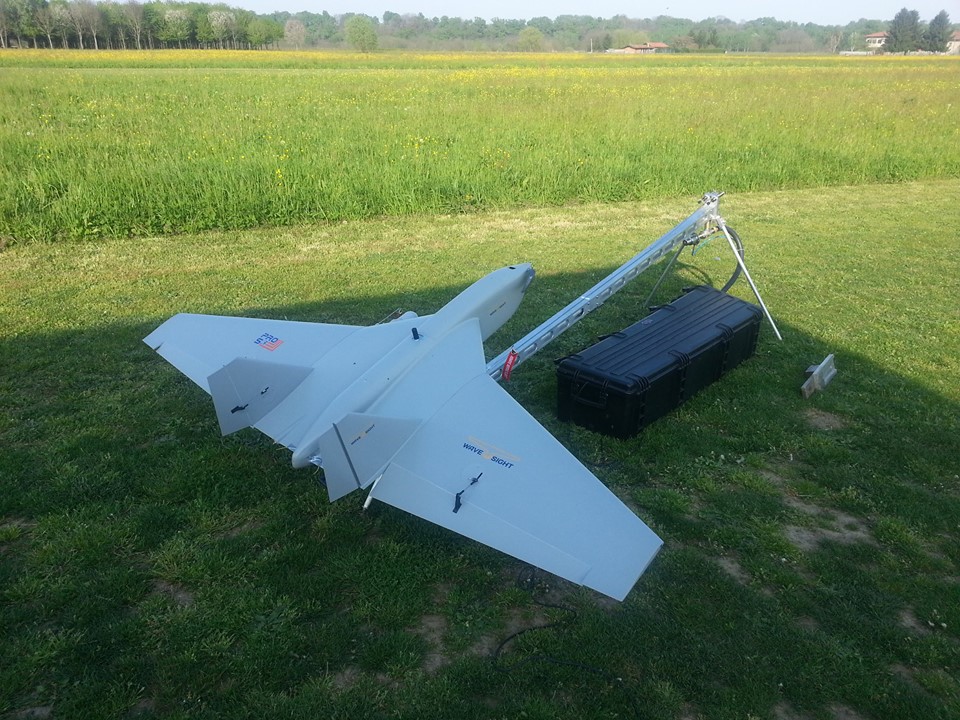
Today we loaded down the FireFLY6 with double the "normal" battery load.  In addition, it carried a full suite of avionics, including a Naza M V1 for hover control and an APM 2.6 for forward flight control.  The APM was decked out with GPS, telemetry, and an airspeed kit (crucial for maximizing flight time).  For propulsion, our PowerPACK.  Finally, to make it a realistic load out, it was fitted with our GoPro nose cone and equipped with a Hero 3 camera and a wireless video link with dedicated battery.

We arrived at our normal flying field to discover it flooded thanks to New Hampshire's spring thaw.  No problem for the FireFLY6.

We did a standard FireFLY6 vertical takeoff, transitioned to forward flight, entered Auto mode, monitored and waited.  At an average cruise speed of ~32 knots (16.5m/s), and after a vertical landing of course, the result was a total flight time of 32 minutes, 38 seconds.

For those who are looking to use the FireFLY6 in applications where ground range is paramount (mapping, agriculture, search & rescue, and package delivery quickly come to mind), half an hour at such an airspeed results in a total coverage of nearly 30km (~18.5mi).  In comparison, viable multicopter solutions generally fly 15-25min at ground speeds of around 5m/s, which would result in a maximum total coverage of about 7.5km (~4.7mi), less than a third of the range that the FireFLY6 demonstrated today.  While pure fixed wing platforms can boast higher ground ranges, they come with the weakness of needing large spaces for takeoff and landing, something that is often hard to find in everyday life.

This demonstration was in direct response to feedback that we received here at DIYDrones.  Thanks!


FONTE:FireFLY6 Demonstrates Half Hour Flight Time - DIY Drones

Oculus Rift head-tracked video on a drone

Oculus Rift head-tracked video on a drone


Not sure how much stereoscopic effect you can get from the air.

We did the same last year with Oculus Rift from a plane (see below), and it just looked like regular FPV.


FONTE:Oculus Rift head-tracked video on a drone - DIY Drones


Aerobot- FE 650 QC

Aerobot- FE 650 QC

FE-Tarot-650-Iron-Man-FPV-GPS-Gopro-011-980x408
Our FE 650 QC folding quadcopter is made from Toray 3K carbon fiber cloth, woven carbon fiber boards and 3K hollow twill pure carbon fiber carbon fiber tubes with CNC machining and design standards much higher than similar products on the market.  The frame itself weighs only 476 grams but can be loaded down with 5 lbs of equipment.  Flight times range from 15 minutes to 60 minutes depending on setup and battery capacities.  Autopilot capabilities include:
- Auto launch and land
- Stability and GPS flight mode
- Advanced On Screen Display with altimeter, speed, volts, amps, signal strength, flight mode, compass, attitude line, and distance home
-Available Ipad Ground Station and controls
This quadcopter is particularly suited to do surveillance, observation, exploration, remote sensing, mapping, aerial reconnaissance, fire observation, patrol and farm monitoring.  The folding compact design is made for users with high portability requirements and various equipment installs.  We include the Tarot 2 Axis Stabilized Gimbal for level and controlled photo and video recording.
Kit Includes:
Tarot 650 Folding Frame
Carbon folding landing gear
Carbon dirty plate and accessory plates
(4) T Motor MN3110 470kv motors
3.5mm gold bullet connectors
(4) F30-A SimonK 30amp ESC’s
Tarot 2 Axis Stabilized Gimbal with control board and manual tilt function
DJI Naza V2 with GPS
Folding Aluminum NAZA GPS mount
DJI iOSD Mini On Screen Display
Fr Sky Taranis Transmitter w/ 3S Lipo
(4) Carbon propellers
EzUHF Long Range TX and 12 channel Diversity RX kit
1.3Ghz 400mW video TX
650TVL FPV Flight Camera
XT60 Connectors
Built for 3s and 4s Lipo operation.
This is a complete Ready To Fly kit including the control transmitter, long range UHF equipment and all FPV gear. Batteries and FPV Ground Station sold separately. Shown with GoPro-not included


FONTE:Aerobot- FE 650 QC | sUAS News

Phantom clone running APM


Phantom clone running APM


This is actually pretty cool. The Cheerson CX-20 Phantom clone ($330 at Banggood) uses an APM clone flight controller, running ArduCopter 3.1. Found on RC Groups here.


FONTE:Phantom clone running APM - DIY Drones

First Post - Some good news


First Post - Some good news


Hey Guys


Before I start...just a little bit of information about myself. I'm located in Pretoria, South Africa. I have been flying heli's and planes for just over a year now and decided that it's time to get myself a multirotor. I did a hell of a lot of research online as well as tons of reading and came across DIYDrones.com.

I recently joined DIY Drones and have not had much to say yet (my subsrciption was only approved earlier today) ... but I have been doing A LOT of reading and became very jealous of all the nice projects everyone here have been building. I have also gotten a couple of nice ideas in the process, that to this amazing website.


Tonight, I had so good news though ... I recently ordered everything needed to start my first Quadrotor build. I just received an email notifying me everything has arrived and is ready for collection.


Tomorrow I'll do the trip from Pretoria to Johannesburg to collect my parts and will be posting some more information once everything is here.


Since there are no unboxing videos of the kit I ordered on youtube, I think I'll try and do an unboxing video and will link it here as well.

From then on I plan to document the build in as much detail as possible.


I will do the build in stages using the parts in the kit but will hopefully be adding things like the FPV, camera gimbal and LED lighting at a later stage.

I'm also already in the process of planning but I'm already my next build (Using Autocad)


I'll chat to you all soon... Wish me luck :D


PS: The image above was added to conform to Blog Rules and the vehicle in this post is not owned by me gut come from the big Google Machine :D I will add some photos of my drone parts as soon as I have collected it today :D


FONTE:First Post - Some good news - DIY Drones

martedì 29 aprile 2014

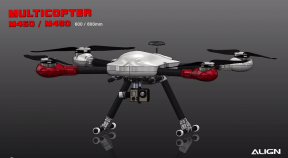
M480, le drone multirotor selon Align

M480,
le
drone
multirotor
selon
Align


align M480


Align, la firme Taïwanaise fameuse pour ses hélicoptères
aussi beaux qu’efficaces, s’apprête à commercialiser un multirotor de grande
taille le M480 nous vous en avions parlé ici. On sait très peu de
choses sur cette machine si ce n’est qu’elle se base sur un châssis
Sky-hero
de grande taille qui de facto le destine plus aux professionnels
qu’aux amateurs éclairés que nous sommes.


Un air de déjà vu


Les quelques informations qui apparaissent dans la vidéo laissent augurer un
système complet, à l’image du leader du secteur DJI. La stabilisation est
assurée par une centrale APS-M sur laquelle ont ne sais rien, si ce n’est
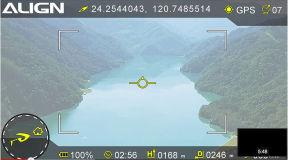
qu’elle utilise un GPS. Il dispose d’un système OSD et donc d’un retour vidéo
comme on peut le voir sur cette capture. Le système est visiblement à un
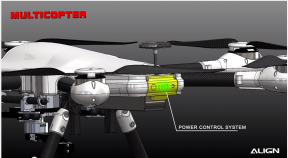
stade de développement avancé. On apprend également que la batterie sera un 6S
(22,2V) de 5400mAh qui disposera d’une jauge à LED qui ne sera pas sans vous
rappeler quelque chose de connu.


align batterie align osd


En vol


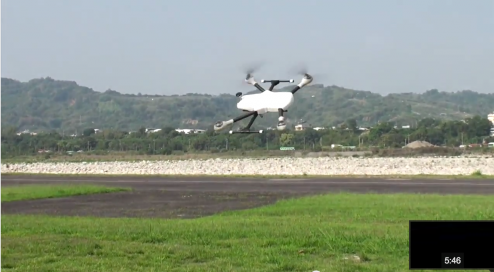
L’appareil poursuit sont processus de développement aux mains expertes du
pilote maison Kenny Ko. Qui se charge d’essayer de trouver les limites de vol de
l’appareil avec un certain style assez reconnaissable de pilote
d’hélicoptère.


m480 en vol


La video


FONTE:M480, le drone multirotor selon Align | HelicoMicro.com

Walkera QR X800

Walkera
QR
X800


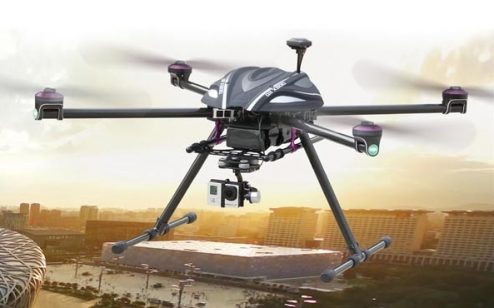
walkeraqr800-01Les constructeurs d’engins volants entendent tous
séduire les photographes et vidéastes, amateurs ou professionnels. Et chacun y
va de son appareil capable de porter du matériel vidéo haut de gamme. Chez
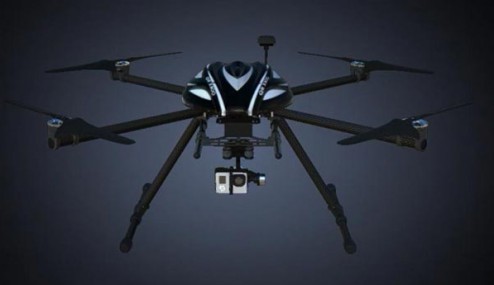
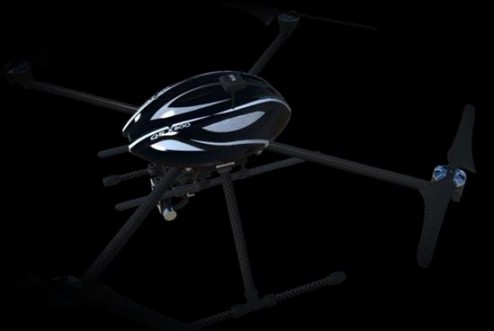
Walkera, c’est le QR X800, un quadricoptère grand format destiné à voler avec
une caméra Gopro 3 stabilisée. La fiche technique de l’appareil manque encore de
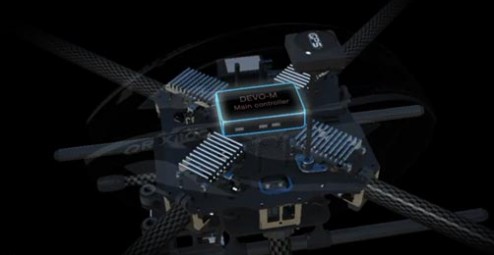
précisions, mais on sait que le cœur de la machine est appelé Devo-M. Un nom qui
sonne comme un croche-pied au fameux Naza-M du constructeur DJI !


Belle configuration


walkeraqr800-04Le Devo-M repose sur non pas un GPS, mais deux. Pour,
selon Walkera, profiter d’une meilleure précision. Le design pliable du QR X800
est prévu pour assurer un transport plus facile. La batterie de 10 000 mAh est
supposée offrir une autonomie de… 40 minutes de vol ! Le constructeur assurer
que le système radio et vidéo est capable d’atteindre 2 kilomètres de portée,
pour un contrôle du cadrage même à grande distance. Bizarre, dans la mesure où
la radio est la Devo F7 avec un récepteur RX702 et un émetteur 5,8 GHz. Il
faudra attendre encore un peu pour en savoir plus. Le prix annoncé par Banggood
(il changera forcément) est de 1240 € environ (hors taxes). A voir ici !


Une vidéo


D’autres photos


walkeraqr800-02


walkeraqr800-03


FONTE:Walkera QR X800 | HelicoMicro.com

The Falcon

The Falcon


The Falcon

The Falcon is designed for specific applications such as surveillance, security, asset inspection, fire and services.

The craft offers long flight endurance – 1 hour plus (60+ minutes) – and can be configured for custom applications and conditions, such as more turbulent and windy conditions in coastal areas.

Carrying a 360-degree pan and tilt head fitted with a Flir thermal imaging camera, laser sighting and targeting and onboard video with wireless downlink.

Coupled with one of Aeronavics new “Mission Control” base station units, this setup offers an unparalleled industrial aerial robotic solution from one of the worlds leading designers and manufacturers in the industry.

The craft is only available as a Factory Ready to Operate solution and comes with a range of tailored service and maintenance packages, training programs and is supplied with custom Pelican and SKB Transport hard cases.

For more information: Falcon


fonte:The Falcon - DIY Drones

Telemetry Radio Range testing with home-made dipole antenna

Telemetry Radio Range testing with home-made dipole antenna


On Sunday I spent the morning self-consciously traipsing around my brother's neighborhood with an apparently wierd collection of hand-held electronics and foam in the form or my APM, battery and a Hextronic 3DR knock-off 915MHz telemetry radio and Skyfun fin. We left a laptop on the top floor of the house running APM Planner with the base station radio connected directly to the USB port and using a standard "duck" monopole antenna.


The mobile unit used my experimental lightweight directly-soldered dipole and the contraption was powered by a standard Futaba NiCad receiever pack as pictured above.  The aim of the new antenna design was to reduce mass and configure it so that it could be embedded entirely within the vertical stabilizer of the Skyfun.

Unfortunately, I don't have a functioning GPS at the moment, so I located our position relative to the base station by memory and adding a series of coded yaw and roll gyrations of the APM to help identify the approximate location by post-processing the tlog file and correlating with Google Earth measurements. The time-domain plot of the RSSI results looks like this:


What is immediately obvious is the elevated noise floor at the base station. I guess it could be laptop power supply related or some other component, but I think it begs some experimentation with USB cable extensions and remote antennae. I'd also like to make a dipole up to see if I can improve the efficiency.

From the post-processed position data (approximated by the ruler function in Google Earth) I have plotted an RSSI profile with radius. Note that we were not line-of-sight for a lot of the meanderings due to the geography and surrounding suburbia. There is also a huge steel girder railway bridge that we passed under during the process, which appears to have had some effect. The transmission dropout in the first graph appears to be due to terrain masking entirely.


During the log file post-processing in Excel, I concocted an error rate calculation to compare the data with RSSI. What you see here is probably of little absolute merit, but it does indicate a dramatic increase in the error rate as the RSSI value falls much below 100. The time-domain plot would seem by eyeball to indicate successful transmission with an even lower RSSI.


Since I had also wanted to see if my new-fangled antenna had made a difference, or at least no difference, I plotted RSSI against remRSSI to see if there was any bias. The answer is, if you squint a little, perhaps to a small degree. The base station appears to recieve a higher signal at range than the mobile station. Whether this amounts to improved signal transmission from the mobile station, it's hard for my RF ignorance to determine, but I will clutch at this straw for some feelings of feeble accomplishment.


So, it seems likely that the system as it stands will yield a reasonably line-of-sight data link to circa 500m. If I can improve the base station noise floor, this may be able to be significantly improved. I was actually hoping to reach the 1000m mark, but this looks like requiring more development and experimentation.

All of this is (for completeness) with the radios configured using mission planner with the frequency band from 918-928MHz, 30 channels, 20mW power. For some reason, this is the maximum power available on the selection menu when connected. There might be a firmware update to try.


fonte:Telemetry Radio Range testing with home-made dipole antenna - DIY Drones

APM 2.5 External Led lights


APM 2.5 External Led lights


Today I mounted and tested my led strobe lights.  (HK 12volt, 1Watt, corn led)

As I'm still a beginner when it comes to flying a multirotor this really helps on orientating and controlling the multirotor.

The Led's are indirectly connected to the APM 2.5 arm signal pin. The led's are mounted in series with a transistor that acts as a switch. The apm board sets the switch (transistor) on or off. I used very common and cheap electronic components that you should find in every diy electronics shop.


I have uploaded a shematic (connection diagram), pictures and movie to my blog (http://wipo-y6copter.blogspot.be)


fonte:APM 2.5 External Led lights - DIY Drones

sabato 26 aprile 2014

Il video drone amatoriale di 777 atterraggio aereo di linea porta a indagine - Droni fai da te

Il video drone amatoriale di 777 atterraggio aereo di linea porta a indagine
Inviato da Chris

Anderson


I regolatori canadesi sono giustamente indagando il video qui sopra, che sembra incredibilmente irresponsabile. Dal Global News :


VANCOUVER - Più di cinque mesi dopo che un video di YouTube è stato pubblicato, le preoccupazioni stanno crescendo in merito a possibili conflitti tra droni e aerei.

Droni sono veicoli aerei senza equipaggio (UAV) e sono alle stelle in popolarità.

Tuttavia, un video pubblicato da 'quadrotor Dragonfly' mostra una ripresa video drone controllo remoto di un atterraggio jet all'aeroporto internazionale di Vancouver. Il drone sembra essere a circa la stessa altezza come il getto e non molto lontano.


Transport Canada regolamenta l'uso drone in questo paese e sta cercando di rintracciare il proprietario di questa.


"Air Canada 777 osservato un piccolo elicottero, ha pensato che fosse un elicottero reale," ha dichiarato Bill Yearwood dal Transportation Safety Board. "Ma quando si avvicinò si rese conto che era un elicottero di controllo remoto."

Ha detto incontrando qualcosa di simile in finale in un jet può essere sconcertante, se non addirittura pericoloso.

"Piuttosto un giocattolo sofisticato", ha aggiunto. La tecnologia è abbastanza buona, lo rende facile per qualcuno di operare e può operare lontano da quella persona, in modo che combinazione può rappresentare un pericolo se usato dagli operatori irresponsabili. "

In una dichiarazione mail da Transport Canada hanno detto:

"Transport Canada è consapevole dei video postati su YouTube che mostra un velivolo senza pilota (UAV) in volo vicino all'aeroporto internazionale di Vancouver e il porto di Vancouver.

Transport Canada è molto preoccupato per le operazioni di questo UAV e abbiamo lavorato con il RMCP per determinare l'identità dell'operatore. Stiamo continuando a indagare sull'incidente. Invitiamo chiunque abbia informazioni sui video per compiacere chiamare Transport Canada o e-mail il Issues aviazione civile Reporting System per segnalare questa o incidenti simili. "

Yearwood ha detto che anche se un motore a reazione ingerito un drone, probabilmente non avrebbe causato un incidente come il getto potrebbe continuare a volare dell'altro motore, ma non vogliono indagare le collisioni aeromobile / drone.


FONTE:Il video drone amatoriale di 777 atterraggio aereo di linea porta a indagine - Droni fai da te

3DR X8 RTF Unboxing / Test

3DR X8 RTF Unboxing / Test


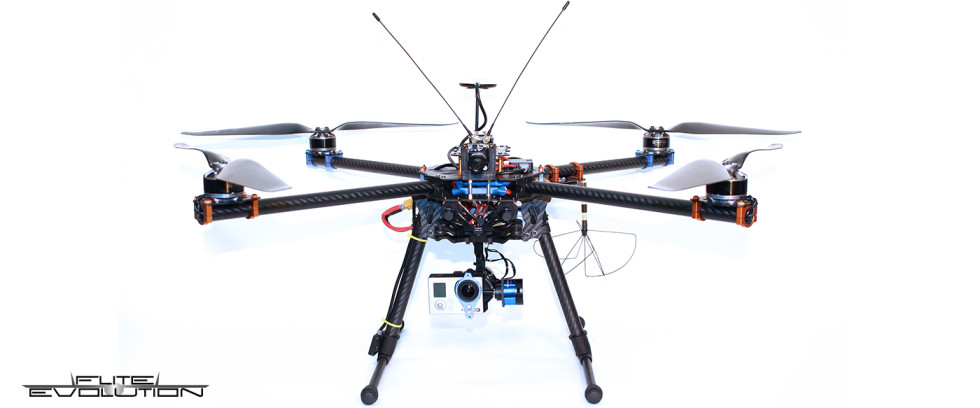
A lot of people have bought the RTF 3DR Iris as there is a plethora of info out there on both performance and modifications.

The X8 is the heavy lifting RTF option and is a little less common.

I've been an Arduplane fan for about 3 years now, starting with the APM 1 in a Skyfun and working my way up to an APM 2.6 in a Skywalker X8 complete with Cellular Telemetry over 3G.

I've never been into copters as much but I thought it was about time I checked out what all the buzz was about and share my experience here.

I bought a cheap quad online for $100 with the intention of learning to fly quads and wrecking a cheap one before letting loose on something a little more expensive.

After getting to the point where I could just about turn the thing inside out, I thought it was about time to upgrade.

I did a lot of research on the DJI vs 3DR and then looked at the Iris.

My thinking was that the Iris is a nice toy but its not really worked up for doing anything too serious, that left the Y6 or the X8 and I eventually decided to go all out and order myself an X8.

I also needed new radio gear as my old Hitec radio was showing its age so I added in a D7 radio, full telemetry kit, spares and a Gimbal all from 3DR to support the cause.

It went on back order with around 2 weeks after ordering before it shipped which was acceptable.


Then the fun began with shipping. For some reason the shipment got held up in Memphis. I left it for a few days then made a call to fedex who weren't much help.


Next I dropped a line to 3DR to see if there was anything they could do and after about a day to respond they managed to work some magic and the package began moving again.


When the package finally arrived it had an "Opened by New Zealand Customs" sticker on it. This always makes me nervous as you half expect it won't get packed back in as well or that something would be damaged during the premature unboxing at customs.

Opening the box, I was a little surprised at the internal packaging, it wasn't exactly a stellar packing job given the journey that box had taken, however there is no way of knowing whether this was the way it was packed by 3DR or whether the re-pack at customs was less than stellar.

However the good news was that nothing was obviously broken and the copter itself was placed in such a way to minimize the chance of any breakages.


 The X8 itself had foam protecting the motors, plastic wrap over all aluminium parts to avoid scratches and one leg was folded in to maximize the space available in the packaging.

The first thing that strikes you about the copter is its size and weight. This is not a toy and everything is constructed with heavy duty components while minimizing weight.

The second thing that strikes you is the fact that if this thing goes down, due to its weight its going to be a write off.

Extreme care will be the order of the day when flying it. Its certainly no acrobatic machine and you can see how its size and weight lend itself perfectly as a camera ship.

There are also some nice touches that make it a true RTF option for someone who doesn't have the build capability to put together their own ship. The LiPo Guard pouch for charging the batteries is a great idea and the included charger while towards the bottom of the quality range is more than adequate for most needs.


One thing that becomes apparent once you have everything laid out is the lack of things to actually put together. 3DR advertise this as a RTF kit which I was skeptical about and was expecting to spend at least a day building it, however it really is ready to fly with only minor assembly.

Nevertheless I took the time to check over the entire unit, tightening screws, applying loctite and double checking everything.

Connecting it to the mission planner was straight forward, and all the settings were dialed in and ready to go for the airframe. A firmware update was needed to bring it up to the latest version and because I am new to Pixhawk I had some head scratching before I discovered you need to press the safety button when loading firmware.


I decided to fly it without the Gimbal initially in case there were any mishaps.

So how did it fly...

Well pretty much perfectly.

Stabilize was as solid as a rock. I fully expected to spend the entire first flight battling to keep control of it while modifying PIDs, but it gently lifted off the ground and sat in the air perfectly stable.

Flicking it into Alt Hold mode yielded similarly successful results. I took it for a wee spin to test its responsiveness and was impressed by how rock solid this ship is.

I was feeling so confident about its performance so far I did a quick double check that it had GPS lock and then dropped it into Loiter and there it sat.

Since then I have dumped about 6 batteries through it and I continue to be impressed.


Next step was to add the gimble and take it for a spin with a GoPro.

This has been the hardest part of the whole process, tuning up the Tarot Gimbal can be quite a challenge and a novice would certainly struggle with it. It took me about 2 hours to get a nice smooth config. The settings I needed turned out to be completely different from some of the configs posted on the internet, however once its setup it really is a nice Gimbal.

I will post some shots from the GoPro once I take the X8 for a flight with the Gimbal attached.


In summary, the 3DR X8 2014 edition is a rock solid camera platform suitable for professional use.

It really is RTF but I would not recommend it to someone who has no experience either flying or with the APM. There are simply too many things one could get wrong that could dump this air-frame into the dirt.

This is the perfect system for someone that:

  • Already has experience flying an APM or Pixhawk based plane or copter
  • Doesn't have the time required to put together a large X8 copter or doesn't have experience building models.
  • Wants a heavy duty camera platform
Hats off to everyone at 3DR, you continue to improve with leaps and bounds and credit where credit is due, the X8 is a formidable piece of machinery.


FONTE:3DR X8 RTF Unboxing / Test - DIY Drones

mercoledì 23 aprile 2014

FAA annuncia indagine in uso drone su Denver 420 Rally


FAA annuncia indagine in uso drone su Denver 420 Rally

Dalla ABC News in Denver :

DENVER - La Federal Aviation Administration ha annunciato Martedì che sta lanciando un'indagine ufficiale in tutto il drone che è stato visto volare sopra il 4/20 manifestazione a Denver Domenica.

"Chi vuole volare un aereo - con equipaggio o senza equipaggio - nello spazio aereo degli Stati Uniti ha bisogno di un certo livello di autorizzazione da parte della FAA," Allen Kenitzer dalla FAA ha scritto in una e-mail.

L'autorizzazione può essere sia per il settore privato per esempio a fini di ricerca o di formazione, o ad uso pubblico, che richiede un certificato di esenzione o di autorizzazione (COA) per gli aeromobili pubblico.

Ma droni sono a volte considerati aeromodelli, che hanno solo seguire le linee guida FAA. Tali orientamenti dicono di hobby aerei-volantini devono mantenere i loro velivoli inferiori a 400 metri sopra il livello del suolo e lontano da aeroporti e del traffico aereo. Oltre a questo, le linee guida escludono espressamente il volo di aeromodelli per scopi commerciali.

Il  sito FAA  afferma che "operazione di routine" di sistemi aerei senza pilota su aree densamente popolate non è permesso.


fonte:FAA annuncia indagine in uso drone su Denver 420 Rally - Droni fai da te

UBlox NEO-M8N GPS, GLONASS, Galileo, Beidou, QZSS e il ricevitore SBAS modulo EVAL pronto per l'acquisto


UBlox NEO-M8N GPS, GLONASS, Galileo, Beidou, QZSS e il ricevitore SBAS modulo EVAL pronto per l'acquisto

Abbiamo progettato una nuova scheda basata sul modulo Ublox NEO-M8N.


La scheda NEO-M8N valutazione rende valutare le elevate prestazioni del u-blox motore semplice 8 posizionamento. Con un'interfaccia USB incorporato sia per alimentazione e trasferimento dati ad alta velocità, la necessità di un alimentatore esterno viene eliminato. La scheda NEO-M8N Breakout è molto compatto, ed è user-friendly opzioni di interfaccia e di alimentazione lo rendono ideale per l'uso in laboratori, veicoli e luoghi all'aperto. Inoltre, la scheda di breakout NEO-M8N può essere utilizzato con un PDA o un PC notebook, che lo rende il compagno ideale in tutte le fasi dei progetti di design-in. E 'un PCB completamente assemblato e testato per u-Blox NEO-M8N con connettori antenna SMA.
 
NEO-7N caratteristiche breakout board:

  • 72-channel u-blox M8 motore GPS / QZSS L1 C / A, GLONASS L10F, Beidou B1 SBAS L1 C / A: WAAS, EGNOS, MSAS Galileo-ready E1B / C (NEO-M8N)
  • SuperSense GPS interno,-167dBm
  • Regolatore di tensione da 3,3 V a bordo Ultra a basso rumore
  • USB , I2C (SDA, SCL) e Uart (Tx, Rx)
  • Connettori per antenna SMA
  • u-center Software di valutazione GPS
  • Ampie funzionalità di visualizzazione e di valutazione
  • Supporta servizi AssistNow online e offline AssistNow A-GPS
  • 1 porta UART TTL, 1 porta I2C, 1 porta USB
  • Impulso di tempo LED
  • Memoria Flash per l'aggiornamento e le impostazioni all'interno del modulo firmware (può salvare setings senza batteria)
  • Portabatterie per l'avvio del modulo HOT
  • Dimensioni: 40x18 mm
  • Peso 8.1 grammi
  • Completamente assemblato e pronto per l'uso


 NEO-M8N caratteristiche:

  • 72-channel u-blox M8 motore GPS / QZSS L1 C / A, GLONASS L10F, Beidou B1 SBAS L1 C / A: WAAS, EGNOS, MSAS Galileo-ready E1B / C (NEO-M8N)
  • Precisione di posizionamento 2,0 m CEP
  • Acquisizione                   
    • Partenze a freddo: 26 s
    • Inizia Aided: 2 s
    • Riacquisizione: 1,5 s
  • Sensibilità
    • Tracking & Nav: - 167 dBm
    • Partenze a freddo: - 148 dBm
    • Inizia Hot: - 156 dBm
  • Assistenza AssistNow GNSS online
  • AssistNow GNSS offline (fino a 35 giorni)
  • AssistNow autonomo (fino a 6 giorni)
  • OMA SUPL & 3GPP compliant
  • Oscillatore TCXO
  • Cristallo RTC Built-In
  • Anti inceppamento rilevamento attivo CW e la rimozione.
  • SAW bordo filtro passa banda Extra
  • Flash Memory
  • Antenne supportati attiva e passiva
  • Distanza percorsa odometro
  • Data-logger per posizione, velocità e tempo


fonte:Modulo uBlox NEO-M8N GPS, GLONASS, Galileo, Beidou, QZSS e il ricevitore SBAS EVAL pronti per l'acquisto - DIY Drones

sabato 19 aprile 2014

Lotus FPV Quad-elicottero telaio impermeabile X-UAV 2014 Nuovo


Lotus FPV Quad-elicottero telaio impermeabile X-UAV 2014 Nuovo


Dettagli


il corpo è fatto di EPO in combinazione con PC scheletro, il suo punto di forza è che la sua cassetta di sicurezza in grado di acque, il peso super leggero e con protezione elica.


Lotus consiglia di impostare con:

Asse Foam 450 PC telaio

Peso di volo :1200-1500g

Potenza consigliata: 4 * 4225 KV680

lama: 9045

ESC: 4 * 20A

Batteria: 14.8V, 4S Li-polimero


FONTE:Lotus FPV Quad-elicottero telaio impermeabile X-UAV 2014 Nuovo

giovedì 17 aprile 2014

Agriculture gives unmanned aerial vehicles a new purpose

Agriculture gives unmanned aerial vehicles a new purpose

rorysplane

United Soybean Board

Unmanned aerial vehicles (UAVs), sometimes referred to as “drones,” have found a use beyond the military. According to Rory Paul, founder and CEO of Volt Aerial Robotics, a UAV company, the sky’s the limit for what these devices offer farmers.

“UAVs will be very useful, efficient and economical in scouting crops for diseases and other pests and also for surveying crop conditions and predicting yields,” says Paul. “UAVs have low costs for operation and provide extremely high-resolution images.”

Traditionally, agricultural imagery has been acquired by satellites or manned aircraft. While both can cover large areas, they can be costly for farmers, have extended waiting periods to get the images back and can’t provide the high-resolution images provided by UAVs.

In a recent Focus on Soybean webcast, Paul discussed four ways UAVs can be used for agricultural purposes:

  1. Mapping — This is potentially the most important application as UAVs have the ability to gather hundreds of images of a field, which can be processed and turned into a high resolution map. This allows a farmer to see everything going on in the interior of his fields.
  2. Crop scouting — UAVs are portable, making them an easy addition to a farm. Farmers can send a UAV over a field and see on a monitor the images the UAV is taking in real time. This helps cut down on the time spent scouting crops and gives a farmer a much bigger overview of what’s happening in his or her field.
  3. Population counting — UAVs can be pre-programed to fly to a specific GPS coordinate in a field and take an image of that exact area. Then a farmer can count the number of emerged plants and manage based on that information.
  4. Prospect of crop dusting, aerial applications — This has not been done in the United States yet but has the potential to be very beneficial. In the future it may be possible for these UAVs to be operated by farmers, reducing production costs dramatically. However this potential application faces numerous technical and policy hurdles before it will become a reality.
The soy checkoff supports the “Focus on Soybean” webcasts through a partnership with the Plant Management Network. All U.S. soybean farmers have access to this full presentation for free until April 30, while a shorter executive-summary version of the presentation is always available.


fonte Agriculture gives unmanned aerial vehicles a new purpose | sUAS News

UAV and UAV Landing Platform close to completion!

UAV and UAV Landing Platform close to completion!


UAV and UAV Landing Platform close to completion!


I posted a while back with our project and we have been keeping it in hiding until we fully finished it. We still have some things left to finish.  We were able to get the magnetic locking system to work using 2 HITECH 755 series Servos to lower/lock the magnetic arms.

Main Features Include:

For the Rover

  • Regenerative Charging System  based on a Bedini Motor
  • Magnetic Neodymium Locking System for the quadcopter
  • Mecanum Wheels
  • Andymark 1200 oz-in 198 RPM 2-Stage Planetary Gear Motors
  • XBEE Pro 900 MHz on the Communication Controls
  • APM 1.5 just for real time navigation/GPS
  • Custom Made Motor Controllers
  • All custom embedded code able to handle up to 255 devices
  • Real Time monitoring from a control terminal
  • Touchscreen LCD for controls
  • Fingerprint scanner for authentication
  • Independent Speed Controls for all motors 
  • FPV using a 200mW transmitter on 1268 mHZ
  • Custom made Frame/Shell 
  • Monitoring Control panel
  • 2-Way Mirror Film top
  • NeoPixel Runway Lighting \
  • GOPRO HERO3 on a Pan and Tilt System
  • Maxbotix SONAR
For the Quadcopter:

  • DJI F450 Frame
  • DJI OPTO ESC"s
  • DJI 930kV Motors
  • 10" APC Props
  • 200mW FPV on 1280 MHz
  • XBEE Pro Telemetry
  • APM 2.6
  • MinimOSD
  • DJI  Landing Gear
  • Custom 3D printed landing feet with magnets in them
  • Lasers
  • Frsky 2.4 gHZ Receiver
  • Turnigy 9X Controller
  • GOPRO HERO3
  • Maxbotix SONAR 


Some of the videos are a little outdated as far as the aesthetics go.

But check them out!


FONTE: http://diydrones.com/profiles/blogs/uav-and-uav-landing-platform-close-to-completion